
Athletic archive videotape cinching inspection is the pre-digitization assessment process that identifies whether the wound tape pack inside a legacy game cassette shows signs of lateral layer displacement — commonly called cinching — and determines how severely that displacement has stressed the tape geometry before any capture attempt is made. Cinching occurs when one or more layers of magnetic tape slip sideways relative to the layers above and below them within the wound pack, producing a stepped, terraced, or accordion-like edge profile instead of the smooth, flush edge surface of a correctly wound tape. The condition typically results from high-speed rewind or fast-forward operations performed on consumer equipment, from power interruptions that stopped the transport mid-wind, from storage in positions that allowed gravity to shift loosely wound layers over time, or from prior playback on decks with misaligned tape guides that applied lateral stress to the moving strand. A cinched tape that enters a playback deck without prior inspection subjects its deformed edges and stressed inter-layer geometry to the mechanical demands of the transport path — guide posts, tension arms, the rotating drum, and the capstan — at a point where those stresses can fold, crease, or tear the tape, destroy the portion of the recorded signal located at the stressed section, and jam the deck transport in a way that requires manual disassembly to resolve.
This guide gives school athletic directors, AV coordinators, IT and facilities staff, and recognition-program owners a systematic inspection workflow for identifying cinched tape packs before digitization begins — covering the visual warning signs detectable before any cassette door is opened, a stop-work threshold protocol for tapes that should not be threaded without corrective intervention, a slow-rewind conditioning procedure for mildly cinched tapes, equipment preparation steps for the capture session, and the specialist escalation path for tapes where the cinch damage is too severe for in-house recovery.
Cinching inspection is not optional for collections that include tapes rewound rapidly on consumer equipment — which describes virtually every school athletic archive assembled between the 1980s and the early 2000s.

Lobby kiosks, touchscreen hall-of-fame installations, and digital yearbook archives depend on safely digitized source footage — cinching inspection is the first step in confirming that a tape's wound pack is stable enough to enter the playback transport without risk of tape damage or deck jam
What Cinching Is and Why It Threatens School Athletic Archives
Magnetic videotape is wound onto the supply and take-up spools of a cassette in precise, concentric layers under consistent tension. When that tension is uniform and the tape guides controlling the winding path are correctly aligned, the result is a flush, even pack — the edge of the wound tape forms a single clean plane on each side of the cassette hub, and every layer sits directly over the layer beneath it without lateral offset.
Cinching disrupts that geometry by allowing one or more tape layers to slip sideways within the pack while the tape is in motion or while it is being stored. The displaced layer or layers project beyond the normal pack edge, creating a stepped profile that is visible as a terraced or accordion-like edge when the cassette is viewed end-on. The structural consequences are significant:
Stress on the tape strand. The portions of the tape at the cinch boundary are under lateral tension that does not exist in a correctly wound pack. When the transport attempts to unwind a cinched layer, that lateral tension resists the normal unwinding motion, creating a localized stress concentration that can fold, crease, or tear the tape strand at the point of displacement.
Edge deformation. The edges of the cinched layers that project beyond the pack have been in contact with the cassette hub flange or the shell interior since the cinch occurred. Depending on how tightly the cassette was wound and how long the tape has been stored in the cinched state, those edges may show permanent deformation — microscopically folded or crimped at the tape margin — that will cause guide misalignment and dropout during playback even if the tape is otherwise undamaged.
Timing instability. A tape with irregular inter-layer tension produces inconsistent tension variation as it unwinds across the rotating head drum. That variation manifests as timing jitter in the captured video signal — appearing as horizontal wavy distortion (sometimes called “venetian blind” or “skew” artifacts) in the output — that a time-base corrector may not fully compensate, particularly in longer cinched sections.
Deck jam risk. A severely cinched tape section that encounters the fixed guide posts of the transport path at an angle that the guide geometry cannot accommodate will stall rather than thread smoothly. In a worst case, the stalled section crumples against the guide post, creating a permanent crease across the tape width at that point and potentially jamming the transport mechanism in a position that requires manual disassembly to clear.
School athletic archives are particularly vulnerable to cinching because:
- Consumer equipment use. The vast majority of VHS, S-VHS, and 8mm game tapes in school collections were rewound on consumer decks that operated at full mechanical rewind speed with no provision for tension uniformity at the end of the rewind cycle. Many consumer decks simply released the tape tension at the end of high-speed rewind, allowing the final layers to settle loosely and unevenly onto the supply spool.
- Repeated fast rewind. Game tapes played for coaching review were rewound repeatedly in quick succession — sometimes dozens of times during a single film session — exposing them to the lateral stress of high-speed rewinding far more frequently than a tape used primarily for playback would experience.
- Power interruptions. A tape stopped mid-rewind by a power interruption or accidental ejection has its in-motion layers released without the controlled deceleration and tension equalization that a completed rewind cycle provides, leaving displaced layers in whatever position they occupied at the moment of interruption.
- Long-term lateral storage. Tapes stored on their sides — lying flat rather than standing vertically on the cassette spine — experience gravitational stress on the wound pack that can cause loosely wound layers to sag and shift laterally over years of storage.
Who This Inspection Workflow Serves
| Role | Primary Concern | How This Workflow Helps |
|---|---|---|
| School Administrator | Institutional record integrity | Prevents a capture session from destroying irreplaceable footage through a preventable deck jam |
| Athletic Director | Program legacy and championship history | Ensures cinched tapes are correctively wound before capture rather than played to failure |
| Facilities / IT Staff | Equipment protection | Identifies tapes that could jam or damage the capture deck before they are threaded |
| Librarian / Archivist | Collection integrity and accession documentation | Provides inspection records that follow each tape through the digitization workflow |
| Recognition-Program Owner | Display-ready content | Confirms that footage destined for lobby kiosks has passed a pre-playback safety check |
Schools building out their athletic history for digital recognition programs and trophy case displays will find that cinching inspection is the most reliably preventable cause of footage loss in the digitization process — a deck jam from a cinched tape destroys both the tape at the jam point and the capture session for every tape that was waiting in queue.
Step 1: Pack-Edge Visual Inspection — Reading the Tape Wind Before Any Cassette Door Is Opened
The most important piece of diagnostic information for a cinched tape is visible without opening the cassette, inserting any tool, or powering on any equipment. Stand the cassette on its spine — the narrow edge — and view the tape pack end-on from each side of the cassette. A correctly wound tape presents a flush, even edge on both sides: the tape layers form a uniform plane with no individual layers projecting beyond or receding behind their neighbors.
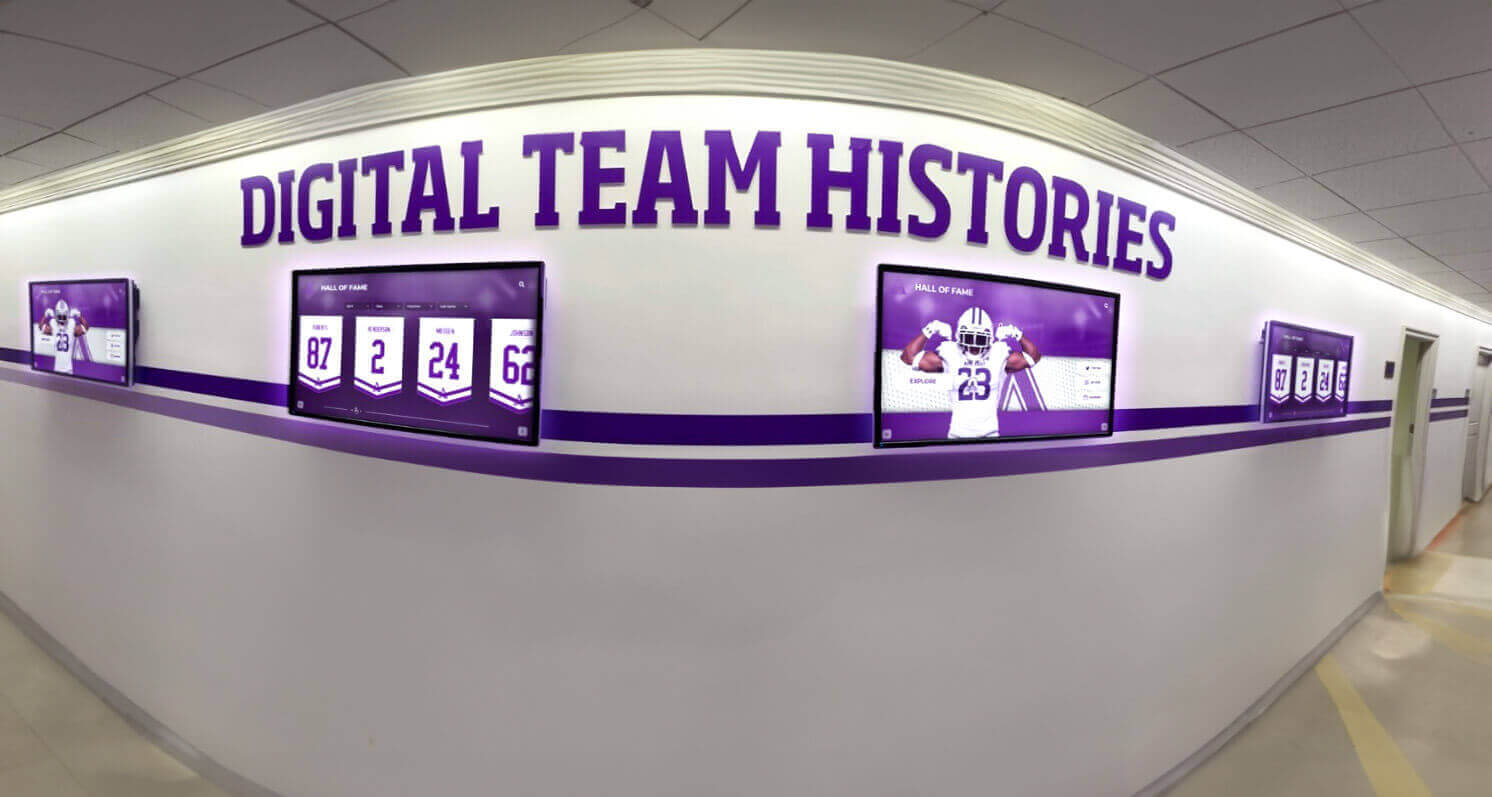
The historic footage displayed on hallway recognition screens was preserved through a pre-digitization inspection process — identifying cinched tape packs before playback is the step that prevents irreversible footage loss at the point of capture
Terraced or stepped pack edge:
The most definitive sign of cinching is a pack edge that shows visible steps or terraces when viewed end-on. Individual layers or groups of layers that have shifted laterally project slightly beyond the general plane of the pack, creating a staircase-like profile. The severity of the terracing indicates the severity of the cinch:
- Minor terracing (one to three displaced layers projecting less than 1 mm): The tape has experienced minor cinching, likely from a single high-speed rewind incident. The risk is present but may be addressable through a careful slow-rewind conditioning procedure before capture.
- Moderate terracing (multiple displaced layers or displacement of 1–3 mm): The tape requires corrective winding and careful evaluation before any capture attempt. Do not thread until the pack has been normalized.
- Severe terracing (deep steps, accordion-like fanning, or displacement exceeding 3 mm on any layer): The tape should be isolated and routed to specialist evaluation before any in-house handling beyond the inspection itself.
Telescoping:
A specific form of cinching in which a large group of contiguous layers has slid together as a unit in one direction, so that one side of the pack appears substantially thicker than the other when viewed end-on, or one face of the pack appears to bulge outward while the opposite face recedes. Telescoping is often more visible from the front or back of the cassette than from the edge — the tape pack appears to lean toward one hub flange rather than sitting centered between them.
Accordion fanning:
In advanced or multi-incident cinching, the pack edge alternates between layers projecting in opposite directions, producing a fan or accordion-like appearance. This pattern indicates the tape experienced lateral displacement in both directions at different points in its history — possibly from rewind incidents on equipment with different guide alignment characteristics — and the inter-layer tension distribution is highly irregular. Accordion-fanned tapes should be treated as Severe risk without exception.
Visible edge deformation or frilling:
Along the pack edge, observe whether any of the visible tape edge shows small folds, crimps, or what preservation specialists call “frilling” — tiny tears or folds along the tape margin caused by the lateral stress of the cinch pressing the tape edge against the hub flange. Frilling is a sign that the cinch has been present long enough to cause permanent physical deformation of the tape edge and that the affected portions of the tape will not track correctly through the guide geometry even after corrective winding.
Pack-Edge Visual Risk Rating
| Visual Finding | Risk Rating | Recommended Next Step |
|---|---|---|
| Flush, even edge on both sides; no lateral displacement visible | None | Proceed to standard pre-digitization inspection |
| Minor terracing (1–3 layers, less than 1 mm displacement) | Low-Moderate | Slow-rewind conditioning; monitor closely during capture |
| Moderate terracing (multiple layers or 1–3 mm displacement) | Moderate-High | Corrective slow rewind; specialist consultation recommended |
| Severe terracing, telescoping, or accordion fanning | High-Critical | Isolate; do not thread; specialist evaluation before any further handling |
| Any visible edge frilling or deformation at pack margins | Escalate | Specialist evaluation regardless of terracing severity |
Step 2: Tactile and Rotational Assessment of the Tape Pack
For tapes that show Low-Moderate or Moderate risk from the pack-edge visual inspection, a brief tactile assessment of the cassette provides additional diagnostic information before any decision on corrective winding is made.
Hub rotation test:
Hold the cassette with the tape window facing you and one hand supporting each side of the cassette. Gently attempt to rotate the supply hub (the left hub in a VHS cassette) a quarter-turn in the forward play direction — the direction the tape would travel during playback — using only finger pressure on the visible hub spoke through the cassette window. Observe and note:
- Smooth rotation with light drag: The tape unwinds from the supply hub in a controlled, uniform motion. This is the expected behavior of a correctly wound tape and does not indicate cinching-related tension irregularity.
- Uneven or stuttering rotation: The hub rotates smoothly for a portion of the turn and then encounters a point of increased resistance before releasing. This stuttering pattern is consistent with a layer or group of layers that has shifted laterally and is now dragging against the hub flange as it passes the point of displacement.
- Complete resistance to rotation: The hub does not rotate under finger pressure without force that risks deforming the cassette shell. This indicates either a severely cinched section locked against the hub flange or a separate mechanical problem (broken hub lock, deformed cassette shell) that must be resolved before any transport attempt.
Lateral pack shift test:
Still holding the cassette in both hands, gently and lightly press each side of the cassette shell near the hub area with your thumbs, noting whether the tape pack feels uniformly supported against both hub flanges or whether one side feels noticeably looser or more compressible than the other. A correctly wound tape pack is consistently tensioned against both flanges. A cinched pack may feel substantially looser on the side toward which layers have displaced, because those layers are no longer in contact with the opposite flange and are not contributing to the radial tension of the pack on that side.
Do not apply significant pressure during this test — the goal is tactile detection of differential pack tension, not compression testing of the cassette housing.
Step 3: Stop-Work Threshold — When to Halt Before Threading
The stop-work threshold for cinching is the point at which threading the tape into any transport — even for a brief test — is more likely to convert a repairable cinch into permanent tape damage than to yield useful diagnostic information.
Stop work immediately and do not thread if any of the following are observed:
- The pack-edge visual inspection shows severe terracing, telescoping, or accordion fanning at any point around the pack circumference.
- Visible frilling, folding, or crimping of the tape edge is present on any cinched layers.
- The hub rotation test reveals complete resistance or resistance so severe that applying enough force to rotate the hub would risk deforming the cassette housing.
- The tape is a historically significant recording — a state or regional championship game, a record-setting individual performance, a coach’s final-season footage — where the consequences of a deck jam destroying the recording are not acceptable.
- The collection contains multiple tapes from the same event or recording run that also show cinching, indicating a systematic rewinding problem that may have affected all tapes from that session similarly.
The logic behind the threshold:
A cinched tape’s most dangerous moment is the instant a powered transport attempts to thread it. The transport motor applies full threading tension to the tape strand simultaneously with the mechanical displacement of the tape leader by the threading mechanism. If a cinched section enters the threading path at that moment, the lateral tension at the cinch boundary combines with the threading force to create a stress concentration that exceeds the tape strand’s tensile strength at the crease point. The tape either folds, tears at the folded edge, or binds against the guide post in a way that stalls the threading motor — at which point the transport attempts to free the jam by applying additional torque, compounding the damage. Stopping before this sequence begins costs only the time for a corrective slow rewind. Proceeding past the threshold can cost the recording permanently.
Schools that have developed formal digitization programs as part of broader recognition infrastructure — including controlled vocabulary systems for athletic archive records and data completeness protocols for award records — should incorporate the cinching stop-work threshold into their digitization policy documentation, ensuring that all staff and volunteers understand both the threshold criteria and the escalation path.
Step 4: Corrective Slow-Rewind Protocol for Low-Moderate Cinch
For tapes that show minor terracing without frilling and pass the hub rotation test, a slow-rewind conditioning procedure can normalize the pack tension before the capture session. This procedure does not repair a severe cinch; it redistributes the inter-layer tension of a mildly cinched pack to a more uniform state that reduces (but does not eliminate) the risk of threading stress at the displaced section.

Corrective slow-rewind conditioning prepares mildly cinched tape packs for safer capture — the goal is normalizing inter-layer tension so the footage can be digitized and delivered to recognition displays without the tape failing at the cinch point during playback
Equipment and preparation:
- A professional or prosumer VCR or VTR with a slow-rewind mode or variable-speed rewind control. Consumer decks that offer only a single high-speed rewind setting should not be used for this procedure — high-speed rewind on an already-cinched tape can deepen existing cinching or introduce new layer displacement at a different point in the pack.
- A clean playback environment: the deck should have been cleaned since its last use with a potentially contaminated tape.
- A blank record: note the tape’s accession number, the inspection findings, and the corrective winding date so this step is documented in the collection’s accession record.
Procedure:
- Load the cassette and engage slow rewind. If the deck has a variable-speed or slow-rewind mode, select the slowest available setting. The tape should travel at well under half the full-speed rewind rate — slow enough that the tension on the wound pack remains close to the tension present during normal playback, rather than the elevated centrifugal tension of high-speed rewind.
- Monitor the pack edge during winding. As the tape rewinds, observe the supply hub pack edge through the cassette window. The goal is to see the terraced layers being absorbed back into the pack as the tape is wound under uniform slow tension. A tape responding well to slow rewind will show a progressive reduction in step height at the terraced sections. A tape whose cinch does not improve during slow rewind — or worsens — should be stopped immediately and escalated.
- Complete one full slow rewind to the supply hub.
- Allow the tape to rest for 10–15 minutes. Inter-layer tension takes time to equalize after winding. Do not immediately fast-forward or play the tape after the slow rewind.
- Repeat the pack-edge visual inspection. If the pack edge now shows a flush or near-flush profile, the tape may proceed to monitored capture. If significant terracing remains, perform a second slow rewind and re-inspect. If two slow rewinds do not substantially improve the pack edge, escalate to a specialist rather than attempting a third.
- Document the outcome. Record the pre-conditioning and post-conditioning pack-edge rating in the tape’s inspection log. This record is essential if the tape is later sent to a specialist — it tells the specialist what the cinch looked like before in-house intervention and what intervention was attempted.
Athletic programs that have safely conditioned and digitized their archive footage can integrate that content into touchscreen hall-of-fame installations, lobby kiosks, and digital yearbook archives. See how Rocket Alumni Solutions connects historic game footage to school recognition programs that serve students, alumni, and visitors throughout the school year.
Step 5: Equipment Inspection Before Capture of a Cinch-Affected Tape
Even a tape that has passed the slow-rewind conditioning step and shows an improved pack edge requires additional preparation at the capture workstation before the deck is powered on. The corrective slow rewind normalizes tension but cannot reverse edge deformation that occurred at the cinch boundary during storage. Those deformed sections will still stress the guide geometry differently than a fully healthy tape, and the capture setup should account for that difference.
Deck condition check:
Before loading a cinch-affected tape for capture, verify that:
- All tape guide posts are clean. An oxide or debris deposit on a stationary guide post can create localized friction that converts the mild lateral stress of a formerly cinched section into a stress concentration sufficient to fold the tape edge at that point. Wipe each guide post with a dry, lint-free swab and inspect for any discoloration or buildup.
- The capstan pinch roller surface is clean and uniformly smooth. A rough or debris-coated pinch roller applies non-uniform lateral force to the tape strand that can displace a borderline tape pack during playback.
- The cassette cradle and loading mechanism move freely. A stiff or misaligned loading mechanism can torque the cassette during loading, shifting the pack position relative to the tape path and exacerbating a residual cinch.
Transport tension setting:
If the capture deck supports back-tension adjustment (available on many professional and prosumer VTRs but not on consumer VCRs), reduce the back-tension setting to the lower end of the manufacturer’s recommended range for the format being captured. Lower back-tension reduces the force the transport applies to the tape strand during playback — which reduces the stress on the deformed edge sections of a formerly cinched tape without compromising signal recovery in most cases. Document the back-tension setting used in the capture record.
Initial play monitoring:
When the tape begins playing, observe both the monitor output and the deck transport behavior closely during the first 30–60 seconds:
- Monitor output: Watch for dropout, horizontal distortion (skew or venetian-blind artifacts), or a picture that appears to “breathe” or undulate horizontally. These artifacts indicate the formerly cinched sections are producing timing irregularities as they pass through the transport.
- Transport sound: Any new squeal, catching sound, or change in transport noise during playback should trigger immediate stop-and-eject. Do not allow a catching sound to continue — it indicates the tape strand is encountering a guide or mechanism it is not tracking through correctly.
- Post-ejection guide check: After the first play pass, eject the tape and inspect the stationary guide posts with a bright light. Any lateral wear marks — vertical scratches along the guide post surface not present before the capture session — indicate the tape’s deformed edges were in contact with the guide surface in a way that may worsen with continued playback.
Schools building recognition programs that incorporate both historic photographic archives and video footage will find that the monitored-capture discipline applied to cinch-affected tapes parallels the careful handling required for other fragile archive materials — the principle in each case is to intervene early rather than allow observable degradation to continue.
Step 6: Specialist Escalation — When In-House Handling Is Not Appropriate
Some cinched tapes cannot be safely conditioned or captured in-house regardless of the care applied. The cinch may be too severe, the edge damage too extensive, or the tape too historically significant to risk on an in-house capture attempt that has a meaningful probability of destroying the recording at the jam point.

Championship game recordings, record-setting performance footage, and coach interviews held on heavily cinched tapes are the collection items most in need of specialist escalation — the cost of professional treatment is far lower than the cost of losing the recording permanently
Criteria for specialist escalation:
A tape should be sent to a professional videotape preservation specialist when any of the following apply:
- The pack-edge visual inspection shows severe terracing, telescoping, or accordion fanning at the stop-work level described in Step 3.
- Visible frilling or edge deformation is present on any cinched layers.
- Two rounds of slow-rewind conditioning did not substantially improve the pack-edge profile.
- The tape is identified as historically significant — a championship game, a record-setting individual performance, a coach’s farewell address — where the consequence of in-house failure is the permanent loss of irreplaceable footage.
- The tape shows additional degradation conditions alongside cinching — sticky-shed syndrome, oxide shedding, or mold contamination — that require specialist intervention independently of the cinch.
- The tape format requires specialized playback equipment not available in-house: open-reel 2-inch or 1-inch Type C with significant pack irregularity, or an early Betamax or Video8 cassette in heavily deformed condition.
What specialist services offer for cinched tapes:
Professional preservation labs have tools and techniques that are not available in most school AV environments:
- Pack conditioning on precision winding equipment. Labs operate tape winding machines that control tension, speed, and lateral position with a degree of precision unavailable on consumer or prosumer VCRs. These machines can normalize a cinched pack over multiple slow-wind cycles at tension levels specifically calibrated to the format and the tape’s condition without imposing the threading stress of a playback transport.
- Manual decinching techniques. For tapes with isolated severe cinch sections, some labs perform manual intervention — carefully separating displaced layers under magnification and rewinding the affected section by hand before machine winding the remainder of the pack.
- Edge-damage evaluation and treatment. Specialists can assess whether frilled or deformed tape edges can be played through with appropriate guide adjustments or whether the affected sections require splicing around to prevent a transport jam.
- High-stability transport capture. Labs capture archive footage on professional-grade transports with time-base correctors calibrated for the specific instability profile of a cinch-affected tape, recovering video signal from sections that consumer-grade equipment would present as unwatchable.
Preparing tapes for specialist transfer:
When sending cinched tapes to a preservation specialist, include with each tape:
- The tape’s accession number and a copy of the pack-edge inspection record from Steps 1 and 2.
- The stop-work trigger observed, if any.
- The results of any corrective slow-rewind conditioning attempted, including the number of cycles and the before-and-after pack-edge rating.
- Any known history of the tape’s rewinding practices — whether it was repeatedly rewound on high-speed consumer equipment, whether it was stopped mid-rewind by a power interruption, or whether the cinch was present on acquisition.
- The desired output format for the master file and the priority ranking relative to other tapes being sent at the same time.
Schools that have developed formal athletic award review and records management processes and built recognition programs around those records will find that specialist escalation for the collection’s most fragile tapes is a natural extension of the care applied to the broader archive — the investment in the display infrastructure is protected only if the source material survives to populate it.
Cinching vs. Related Tape Pack Conditions: A Comparison
| Condition | Pack-Edge Appearance | Mechanical Symptom | Primary Cause | Recommended Response |
|---|---|---|---|---|
| Cinching | Stepped, terraced, or accordion edge; visible lateral displacement | Stutter during hub rotation test; transport stall risk | High-speed rewind, power interruption, improper lateral storage | Slow-rewind conditioning (mild); specialist pack conditioning (moderate–severe) |
| Windowing | Crescent-shaped gaps or windows in the pack visible through the cassette window | Irregular tension during playback; possible dropout | Single high-impact rewind on fatigued tape | Slow rewind; professional evaluation before capture |
| Loose-pack syndrome | Pack does not feel uniformly tensioned; compressible to pressure | Tape slaps or flutters during threading; inter-layer debris | Rewound at insufficient tension on aging equipment | Slow rewind to re-tension; monitor closely during capture |
| Oxide shedding | Normal pack edge; brown powder visible inside cassette shell | Grit or scratch during manual winding | Binder adhesion failure | Stop work; isolate; specialist evaluation |
| Sticky-shed syndrome | Normal or slightly tacky tape surface visible through window | High-pitched squeal during playback | Binder hydrolysis | Stop work; bake before capture |
| Mechanical deformation (hub damage) | Uneven pack with no corrective improvement | Transport noise; cassette does not seat correctly | Dropped or crushed cassette shell | Shell transplant (specialist); do not attempt in-house |
The distinction between cinching and loose-pack syndrome is particularly important in practice: loose-pack syndrome is a tension deficit condition that can be corrected by a single slow rewind with no structural tape damage, while cinching is a structural displacement condition in which individual layers have physically shifted position and may have sustained edge deformation that slow rewind alone cannot resolve. When in doubt, treat the tape as cinched — the more conservative path — until the pack-edge profile confirms the simpler diagnosis.
Connecting Inspected Footage to School Recognition Programs
The goal of the cinching inspection workflow is not the inspection itself but the footage that successfully reaches the other side of it: safely captured game recordings that take their place in the school’s living athletic record and serve students, alumni, and visitors through the recognition programs built to honor them.
Once a tape has cleared inspection and been digitized — whether through monitored in-house capture after corrective conditioning or through specialist processing — that footage connects directly to the recognition contexts that make it meaningful.

Recognition displays, hall-of-fame installations, and lobby kiosks draw their content directly from the archive — systematic cinching inspection is what ensures the game footage behind those displays survived the digitization process intact
Hall-of-fame touchscreen installations: A short clip of a record-setting performance embedded in a touchscreen inductee profile, alongside statistics and a portrait, creates a recognition experience that static displays cannot match. Schools exploring athletic banquet planning and recognition programs will find that safely digitized archive footage is among the most impactful content available for recognition events — and that the cinching inspection step is what determines whether that footage exists at all.
Lobby video loops and digital yearbook archives: Highlight reels assembled from inspected and digitized game footage provide content that informs and engages every student, parent, and visitor who enters the building. Schools that have begun developing their recognition display infrastructure through color-correction and image quality workflows will find that the same discipline applied to photographic archive materials applies equally to the pre-digitization care given to videotape.
Athletic awards and induction ceremonies: Projecting archive footage at an awards night or hall-of-fame induction — footage the audience has not seen in decades — creates a shared experience that connects current athletes to the program’s history in a way that plaques and trophy cases alone cannot. Recognition programs that incorporate game footage alongside Newton’s rings-free archival scans and physical trophy displays build a recognition culture that is genuinely immersive.
Alumni engagement and homecoming events: A compiled archive reel drawn from multiple games — each tape having passed the cinching inspection and corrective conditioning workflow — provides compelling content for reunion screenings and alumni fundraising events. The investment in the inspection workflow is what makes this content available rather than lost at the deck jam point.
Quick-Reference: Cinching Inspection Decision Table
| Inspection Finding | Risk Level | Immediate Action | Capture Path |
|---|---|---|---|
| Flush pack edge; smooth hub rotation; no lateral displacement | None | Proceed to standard pre-digitization inspection | Standard in-house digitization |
| Minor terracing (1–3 layers, less than 1 mm); smooth hub rotation | Low-Moderate | Slow-rewind conditioning; re-inspect; monitor during capture | In-house with transport monitoring active |
| Moderate terracing (multiple layers or 1–3 mm); slight stutter on rotation | Moderate-High | Corrective slow rewind; specialist consultation | In-house only if conditioning resolves pack edge; otherwise specialist |
| Severe terracing, telescoping, or accordion fanning | High-Critical | Stop work; isolate; do not thread | Specialist pack conditioning and capture only |
| Any visible edge frilling or deformation regardless of terracing severity | Escalate | Specialist consultation before any further in-house handling | Specialist evaluation and recommended path |
| High-significance tape at any Moderate or above | Escalate regardless | Specialist consultation | Specialist-recommended path |
Frequently Asked Questions
How can I tell cinching from loose-pack syndrome before I do a slow rewind?
The clearest indicator is the pack-edge profile under the hub rotation test. A tape with loose-pack syndrome typically shows a pack that compresses slightly under gentle pressure and may feel less uniformly tensioned than a correctly wound tape, but the pack edge is flush — there is no lateral displacement of individual layers above the general edge plane. A cinched tape shows a stepped or terraced edge where displaced layers project beyond their neighbors, which is visible as a distinct staircase pattern. The hub rotation test also helps: a loose-pack tape typically rotates smoothly with somewhat lighter drag than a correctly wound tape, while a cinched tape produces a stutter or catch at the point where a displaced layer meets the hub flange. When the edge profile is ambiguous, treat the tape as cinched and perform a slow rewind — this is the safer choice in both cases and produces no harm to a loose-pack tape.
Does a corrective slow rewind fix the frilling or edge deformation caused by a cinch?
No. Slow-rewind conditioning normalizes inter-layer tension and can cause mildly displaced layers to settle back toward their correct position within the pack, reducing the severity of a minor cinch. However, it cannot reverse physical deformation — folding, crimping, or frilling — that occurred in the tape edge during storage. Once the tape edge has been permanently deformed at a cinch boundary, that deformation remains in the tape material even after the pack is re-tensioned. The deformed sections will still present the transport with a tape edge geometry that differs from an undamaged tape, and the capture should be monitored accordingly. For tapes with visible frilling, specialist evaluation is the appropriate step regardless of whether slow rewind improves the pack edge profile.
Can I perform a slow rewind on a VCR that only has a single high-speed rewind mode?
No. High-speed rewind on an already-cinched tape applies centrifugal tension to the wound pack that is fundamentally different from the low-tension winding produced by a controlled slow-rewind. Performing high-speed rewind on a tape with existing lateral displacement risks deepening the cinch, introducing new displacement at different points in the pack, and compounding any edge deformation already present at the cinch boundary. If no variable-speed or slow-rewind capable deck is available in-house, the tape should be escalated to a specialist or sent to a facility that has appropriate winding equipment rather than subjected to high-speed rewind in an attempt to normalize it.
How should I document cinching findings in the accession record?
The accession record entry for a cinched tape should capture: the date of inspection, the inspector’s name, the pack-edge risk rating assigned (None / Low-Moderate / Moderate-High / High-Critical), a brief description of the specific findings (e.g., “three displaced layers on supply hub side, approximately 2 mm projection, no frilling observed”), the hub rotation test result (smooth / stutter / complete resistance), and the action taken or recommended (proceed / slow-rewind conditioning / specialist escalation). If corrective slow rewind was performed, the record should also note the number of conditioning cycles and the post-conditioning pack-edge rating. This documentation follows the tape through the digitization workflow and becomes the referral document if the tape is later sent to a specialist — it tells the specialist the exact state in which the tape was found and what was attempted before referral.
A systematic athletic archive videotape cinching inspection workflow converts an uncertain collection of legacy game tapes into a documented, risk-tiered asset inventory — directing correctly wound tapes to in-house capture, routing mildly cinched tapes through corrective conditioning before monitored playback, and escalating the collection’s most severely deformed and most historically significant recordings to the specialist treatment they require before any footage is lost to a preventable deck jam.
Ready to connect your safely digitized athletic archive footage to a recognition program that honors your program’s history?
Request a Rocket Alumni Solutions demo and see how schools are bringing legacy game footage into touchscreen hall-of-fame displays, lobby kiosks, and digital yearbook archives.































